Getting Started
This guide aims to give a rough overview over a full proFit workflow. Further examples of the configuration can be found in examples/ and in tests/integration_tests/. If you want to just use a few features have a look at examples/api/, tests and the API reference.
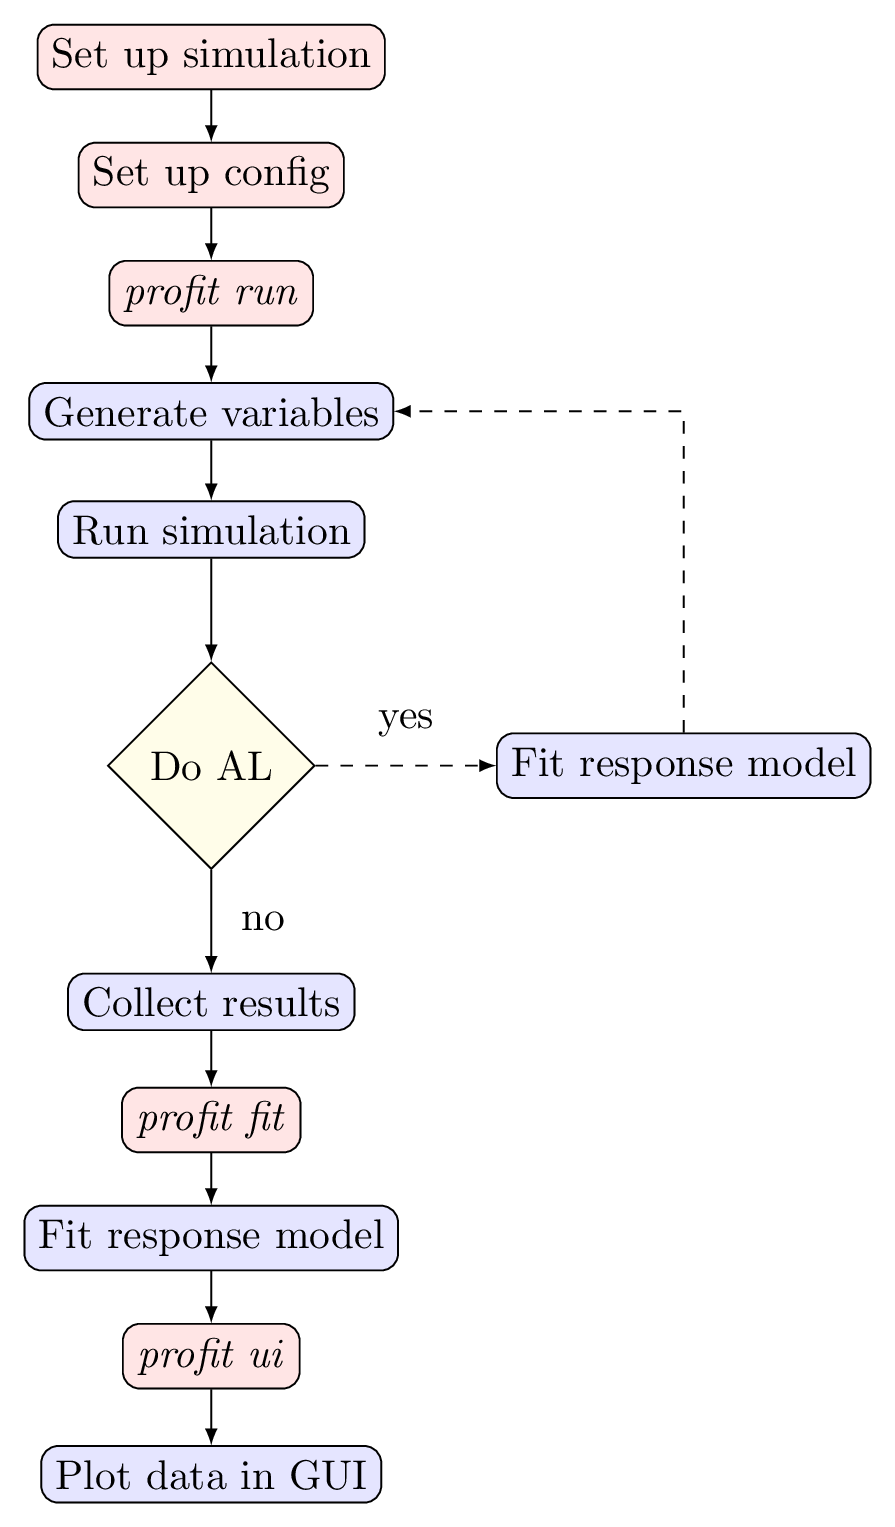
The typical profit workflow
Example API Notebooks:
The Configuration File
proFit is controlled almost entirely via a single configuration file which is usually called profit.yaml. Other filenames are permitted and the respective path can be given as an argument to the profit commands. The configuration is typically written using the YAML file format.
The configuration uses mostly a hierachical structure closely mirroring the structure of the different components. Different implementations of the same component are usually selected using the class attribute. A shorter notation uses the label of the component directly and uses default values for all it’s parameters. The following two snippets therefore are the same:
run:
  interface:
    class: zeromq
run:
  interface: zeromq
There are also shorthand notations for Variables and Encoders.
Set up simulation
proFit currently distinguishes two types of simulations:
- executables with input and output files
- the simulation reads its input parameters from a file, proFit prepares the file using a
Preprocessorthe simulation writes its ouput values to a file, proFit read the file using aPostprocessor
- Python simulations which are called from a function
- the input parameters are the arguments of the functionthe output parameters are the return valuesproFit can wrap this function using a custom
Worker
For executable simulations, the first step is usually ensuring that they are installed properly and run within a dedicated working directory. Find out which environment variables need to be set and link all relevant files. This directory will become the template directory which proFit will (usually) copy for each run of the simulation. Furthermore the simulation will just inherit the environment proFit was started in. A typical directory structure could look like this:
study/
  profit.yaml
  template/
    simulation.x  ->  /path/to/simulation/executable.x
    params.txt
Function simulations can be run without any run directories.
Variables
The configuration file usually begins with ntrain: which set the desired number of data points. The next section is usually variables. In it the different input parameters and output values are defined. For the parameters a suitable distribution from which the samples will be taken is selected. Additionally independent variables allow the output values to be vectors and constant values can also be set directly from proFit. More details can be found in Variables.
ntrain: 100
variables:
  u: Uniform(4.7, 5.3)
  v: Uniform(0.55, 0.6)
  n: 10000
  f: Output
Pre- & Postprocessor
An executable simulation needs a Preprocessor and Postprocessor to prepare the input parameters and collect the results.
The recommended Preprocessor is the profit.run.default.TemplatePreprocessor which will fill placeholders in the template directory with the corresponding values.
For the output values proFit currently supports JSON, HDF5 and CSV/TSV via three different Postprocessors. In addition it is easy to add a custom Postprocessor, see Custom extensions. All the configuration options are given in Configuration. A possible configuration is given below:
run:
  worker:
    class: command
    command: ./simulation
    pre:
      class: template
      path: ./path/to/template_directory  # relative to the base directory
      param_files:
        - params.txt
    post: json
The contents of params.txt could look like this:
# just a plain csv
# u, v, n, m
{u}, {v}, {n}, 10
Python Simulation
For a simulation which can be called from python directly, the recommended configuration is different and uses Custom extensions instead. A python function simulation which takes the input parameters as arguments and returns the output values can be registered with proFit in the following way:
from profit.run import Worker

@Worker.wrap("my_name")
def simulation(u, v) -> "f":
    ...
The type annotation is used to tell proFit which return value belongs to which return value if there are several. The configuration is then:
include: path_to_simulation.py
run:
  worker: my_name
Interface & Runner
The other two main components of the run system are the Interface and the Runner itself. These play a vital role if the simulation should be scheduled on a cluster, rather than run locally. For more information see Cluster Support.
Next steps
Everything should be ready to run now:
calling
profit runwill start startntrainsimulations with different parameters and collect their resultscalling
profit fitwill then use these results to fit a surrogate model which is configured in thefitsection (see Surrogate models)with Active Learning enabled, the fit will already happen during the run step. Active Learning optimizes the paramters at which the simulation is run to gain as much value per simulation run as possible
finally the results can be explored interactively in a browser after starting a
plotly/dashserver usingprofit ui(see User Interface)
There is a wide variety of configuration options to customize the run system, the surrogate fitting and the active learning algorithm. Please have a look at the documentation on the Configuration and don’t hestitate to contact the developers if you encounter any bugs.